Deploying a Static Website with a Contact Form to Cloudflare Pages for Free
In this tutorial, we are going to create a simple HTML webpage with a contact form, push our project to a GitHub repository and then setup Cloudflare Pages to automatically deploy our site each time we update it.
Furthermore, we are going to use a Turnstile CAPTCHA widget to block spam form submissions. The server-side handler for our contact form will be implemented as a serverless application using Cloudflare Workers.
Create GitHub Repo
Start by creating a new repository in GitHub. You can follow these instructions if you are not familiar with GitHub. The name of your project can be anything, but for the purposes of this tutorial I’ll be assuming it’s my-project.
After the repo is created, clone it to you local machine.
git clone https://github.com/YOUR-USERNAME/my-project
My Project
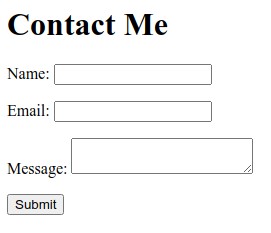
Let’s create a simple HTML webpage with a contact form.
This is the directory structure we want to implement.
my-project
└─public
  └─index.html
Run the commands below in your shell.
cd my-project
mkdir public
touch public/index.html
Open index.html in your favorite editor and add the contents below.
<!DOCTYPE html>
<html lang="en">
  <head>
    <meta charset="utf8" />
    <title>Contact Me</title>
    <meta name="viewport" content="width=device-width,initial-scale=1" />
    <style>
      div {
        margin: 1em auto;
      }
    </style>
  </head>
  <body>
    <h1>Contact Me</h1>

    <form method="POST" action="/api/contact">
      <div>
        <label for="name">Name:</label>
        <input id="name" name="name" type="text" />
      </div>

      <div>
        <label for="email">Email:</label>
        <input id="email" name="email" type="email" />
      </div>

      <div>
        <label for="message">Message:</label>
        <textarea id="message" name="message"></textarea>
      </div>

      <button type="submit">Submit</button>
    </form>
  </body>
</html>
Notice that when the submit button is clicked our form will attempt to POST the input element values to /api/contact. We are going to create a handler for that route later on using Cloudflare Workers.
Commit and push your code to GitHub.
git add .
git commit -m "First commit"
git push
Cloudflare Pages
Time to deploy our website.
Log in to the Cloudflare dashboard. Expand Workers & Pages and then click on Create application → Pages → Connect to Git.

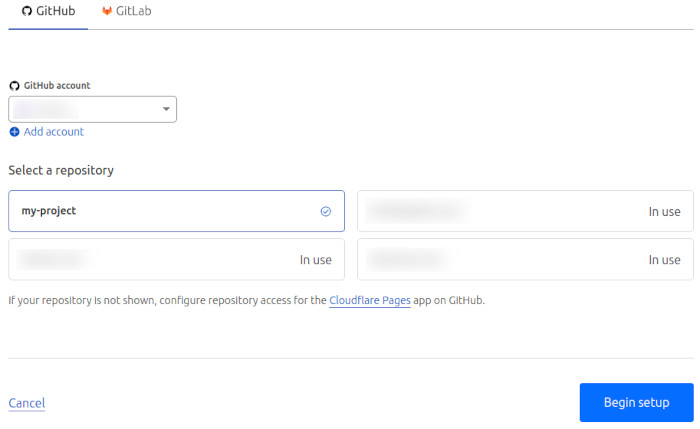
Sign in to GitHub to give Cloudflare permission to read your repo. Select your repo from the list and then click on Begin setup.
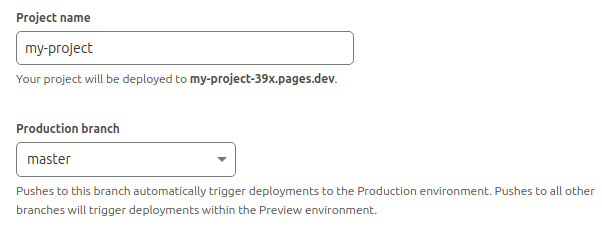
Enter a project name. From this name Cloudflare will derive a hostname to assign to your project.
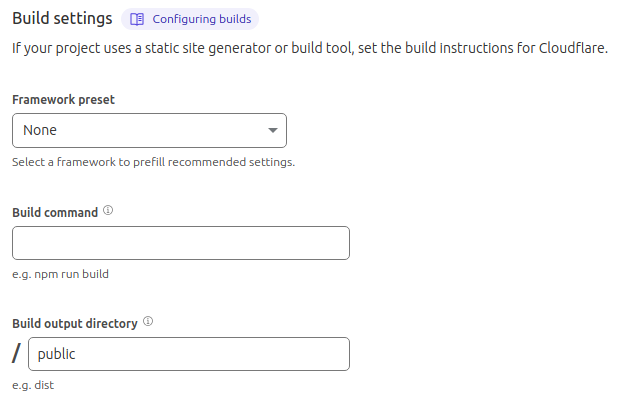
In the Build settings, specify in the Build output directory the directory that contains the HTML code to be deployed, which is /public in our case. Then click on Save and Deploy.
After your project is deployed, you’ll get a URL similar to https://my-project-39x.pages.dev that you can visit with your browser. You also have the option to setup a custom domain for your site (e.g. https://example.com) if you have your own domain.
Cloudflare Workers
For handling form requests to the /api/contact endpoint, we are going to create a small serverless application using Cloudflare Workers.
Cloudflare Pages are integrated with Workers and any applications we create in the functions directory are deployed as request handlers.
For example, with the directory structure below, contact.js will be automatically deployed as a handler for route /api/contact.
my-project
├─functions
│ └─api
│   └─contact.js
└─public
  └─index.html
Furthermore, we typically want to block spam contact form submissions from bots by adding a CAPTCHA challenge.
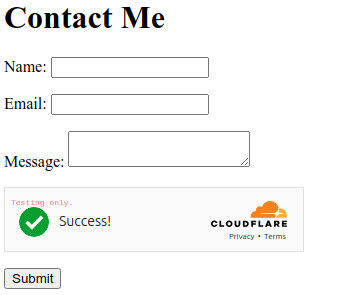
Cloudflare offers Turnstile, which is a CAPTCHA alternative. Adding a Turnstile widget to our contact form just requires loading a script in the HTML’s <head> element and a <div class="cf-turnstile"> at the point in the page where we want the CAPTCHA to appear.
Let’s start by modifying our index.html.
<!DOCTYPE html>
<html lang="en">
  <head>
    <meta charset="utf8" />
    <title>Contact Me</title>
    <meta name="viewport" content="width=device-width,initial-scale=1" />
    <style>
      div {
        margin: 1em auto;
      }
    </style>
    <script
      src="https://challenges.cloudflare.com/turnstile/v0/api.js"
      async
      defer
    ></script>
  </head>
  <body>
    <h1>Contact Me</h1>

    <form method="POST" action="/api/contact">
      <div>
        <label for="name">Name:</label>
        <input id="name" name="name" type="text" />
      </div>

      <div>
        <label for="email">Email:</label>
        <input id="email" name="email" type="email" />
      </div>

      <div>
        <label for="message">Message:</label>
        <textarea id="message" name="message"></textarea>
      </div>

      <div class="cf-turnstile" data-sitekey="1x00000000000000000000AA"></div>

      <button type="submit">Submit</button>
    </form>
  </body>
</html>
The data-sitekey is obtained from Cloudflare’s dashboard when we create a new Turnstile widget, which we are going to do later on. For now, we are using one of the dummy sitekeys.
No other changes are required. The Turnstile widget will create a hidden input named cf-turnstile-response with the token value. As long as you placed <div class="cf-turnstile"> within the form element, when the user clicks on the submit button the token will be included by default in the POST request to your handler.
Finally, let’s create the contact form handler.
cd my-project
mkdir -p functions/api
touch functions/api/contact.js
Open functions/api/contact.js in your editor.
export async function onRequestPost(context) {
  try {
    return await handleRequest(context);
  } catch (e) {
    console.error(e);
    return new Response("Error sending message", { status: 500 });
  }
}

async function handleRequest({ request }) {
  const ip = request.headers.get("CF-Connecting-IP");

  const formData = await request.formData();
  const name = formData.get("name");
  const email = formData.get("email");
  const message = formData.get("message");
  const token = formData.get("cf-turnstile-response");

  const tokenValidated = await validateToken(ip, token);

  if (!tokenValidated) {
    return new Response("Token validation failed", { status: 403 });
  }

  await forwardMessage(name, email, message);

  return new Response("OK", { status: 200 });
}

async function validateToken(ip, token) {
  const TURNSTILE_SECRET_KEY = "1x0000000000000000000000000000000AA";

  const formData = new FormData();
  formData.append("secret", TURNSTILE_SECRET_KEY);
  formData.append("response", token);
  formData.append("remoteip", ip);

  const url = "https://challenges.cloudflare.com/turnstile/v0/siteverify";

  const result = await fetch(url, {
    body: formData,
    method: "POST",
  });

  const outcome = await result.json();

  return outcome.success;
}

async function forwardMessage(name, email, message) {
  // Forward the message to an email address, webhook etc.
}
The entry point of our handler is onRequestPost() and we are expected to return a Response object back to the client.
We get the URL-encoded form data from the body and then validate the Turnstile token. If the token is valid, we forward the message, otherwise we return an error status code. The TURNSTILE_SECRET_KEY is obtained from Cloudflare’s dashboard when we create our widget, but, as previously with the sitekey, we use one of the dummy secrets for testing purposes.
The message forwarding part is not implemented in this tutorial. Some implementation ideas could be calling SendGrid’s API to send emails, calling a webhook to post messages to a Discord channel, etc.
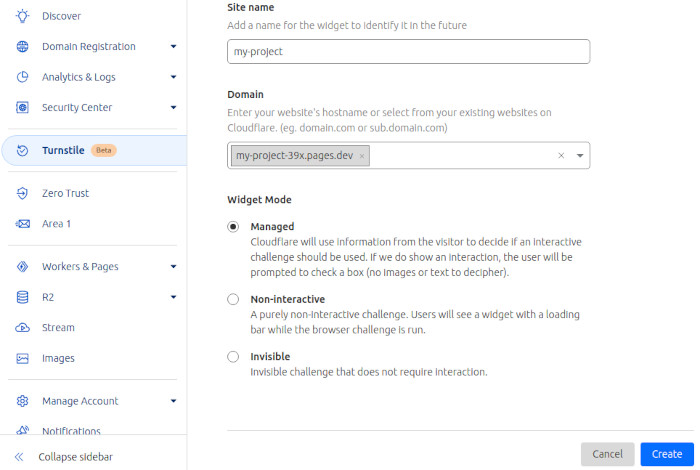
After you are done testing, to obtain real sitekeys and secrets go to Turnstile → Add site in Cloudflare’s dashboard, enter a name and your site’s domain and click on Create. You’ll get a Site Key for the client-side code and a Secret Key for the server-side.
Commit and push your changes to GitHub for your site to be redeployed.
git add .
git commit -m "Add Worker and Turnstile"
git push
For more information you can have a look at Cloudflare’s documentation on Pages, Workers and Turnstile.