Creating a Node.js Project with ESLint & Prettier from Scratch
In this tutorial, we are going to create a new Node.js project from scratch, install NVM, and setup ESLint and Prettier in Visual Studio Code, so that we have our development environment ready to start writing code.
Installing NVM
Not all our projects require the same Node.js version, so it is not practical to have a global Node.js installation. For managing Node.js versions, we are going to use a tool called Node Version Manager (NVM) and set it up to automatically switch to the correct Node.js version used in our projects.
NVM can be installed by downloading and running the latest installation script in NVM’s documentation. At the time this tutorial was written, NVM could be installed by running:
curl -o- https://raw.githubusercontent.com/nvm-sh/nvm/v0.39.5/install.sh | bash
You will probably get a message saying to close and reopen your terminal, so make sure to do that. Then, confirm NVM has been installed properly.
command -v nvm
Let’s create a directory for our new project.
mkdir my-project
cd my-project
For this tutorial, we are going to install Node.js v20.7.0.
nvm install 20.7.0
We want NVM to always use this specific version of Node.js when running our project. All we have to do is add the version to .nvmrc.
echo "20.7.0" > .nvmrc
Every time we are in this directory and run nvm use, NVM will read .nvmrc and switch to Node v20.7.0.
nvm use
Now using node v20.7.0 (npm v10.1.0)
Creating a package.json
We need to create a package.json, before we can install any dependencies.
npm init
You will be asked a few questions about your project (just press Enter to accept the defaults) and npm will create a basic package.json in the current directory.
Recent versions of Node.js have full support for ECMAScript modules (ESM). We are going to enable ESM by adding "type": "module" in our package.json.
{
  ...
  "type": "module",
  ...
}
Installing ESLint
Linters help you catch potential issues in your code before running it, and enforce rules for writing clean code. Modern source-code editors, like VS Code, integrate well with linters and perform linting checks while you are writing your code.
For this tutorial, we are going to install ESLint.
npm install eslint --save-dev
Before using ESLint we need to create a configuration file. Running the command below will ask you some questions and create the file for you.
npm init @eslint/config
Choose the following answers:
✔ How would you like to use ESLint? · problems
✔ What type of modules does your project use? · esm
✔ Which framework does your project use? · none
✔ Does your project use TypeScript? · No
✔ Where does your code run? · node
✔ What format do you want your config file to be in? · JSON
After this step, there should be a .eslintrc.json file in your project’s directory, which we need to modify:
{
  "root": true,
  "env": {
    "es2022": true,
    "node": true
  },
  "extends": [
    "eslint:recommended"
  ],
  "parserOptions": {
    "ecmaVersion": 2022,
    "sourceType": "module"
  },
  "ignorePatterns": [
    "node_modules/"
  ],
  "rules": {}
}
root: Only use the.eslintrc.jsonin the current directory. By default ESLint will also search in parent directories, all the way up to root/, and merge any configuration files it finds.env: Provides global variables for the defined environments.extends: Extends our base configuration file with rules from other files.parserOptions: Defines the ECMAScript version syntax to be supported by the linter.ignorePatterns: Paths the linter should ignore.rules: Our custom linter rules, which override the defaults.
Installing Prettier
ESLint checks your source code for syntax and style errors based on preset and custom rules, while Prettier is used to automatically format your code.
npm install prettier --save-dev
Since some ESLint rules might conflict with Prettier, we use the package below to disable all those rules.
npm install eslint-config-prettier --save-dev
We also need to modify .eslintrc.json and add the prettier rule overrides as the last entry in the ESLint extensions list.
{
  ...
  "extends": [
    "eslint:recommended",
    "prettier"
  ],
  ...
}
Prettier already has some built-in rules. To override the preset rules, we have the option to create a custom configuration file.
Setting up ESLint and Prettier in VS Code
Visual Studio Code is a popular source-code editor from Microsoft. It is available on all platforms.
In Ubuntu it can be installed from the Snap store.
sudo snap install code --classic
For other platforms, you can download the correct version here.
In the previous sections, we installed ESLint and Prettier npm packages. To use them with VS Code we need to install the respective VS Code extensions.
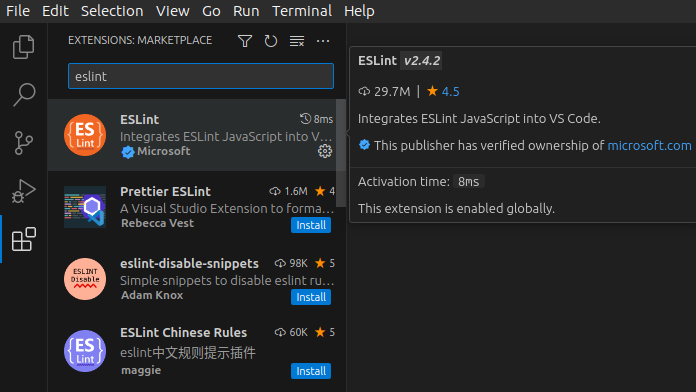
Switch to the extensions tab, then find and install ESLint.
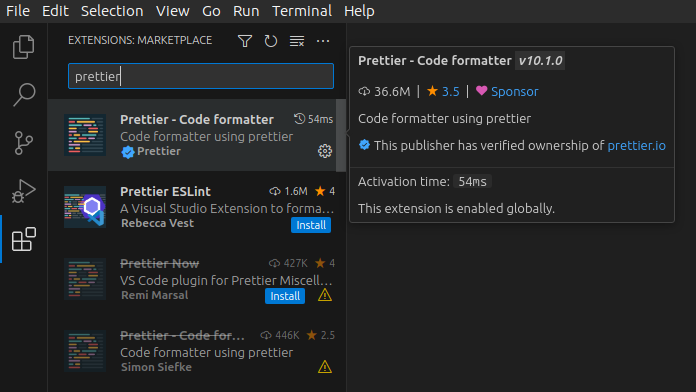
Also install Prettier.
VS Code has several built-in code formatters, so we should to select the one we want to use.
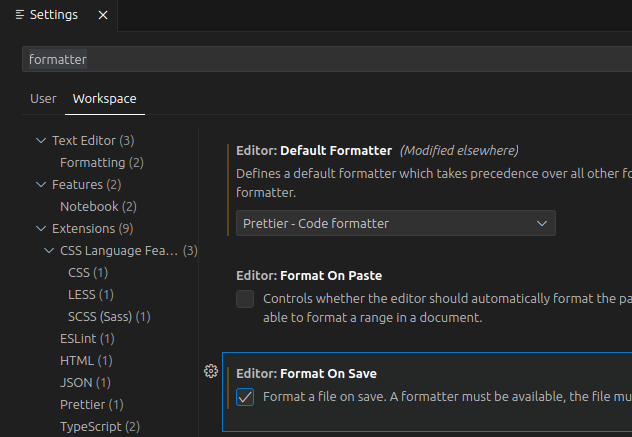
Go to File → Preferences → Settings and type formatter in the search box. Switch to the Workspace tab (not User) and select Prettier as the Default Formatter from the drop-down list. Also, tick the Format On Save checkbox.
VS Code should create a .vscode directory with custom settings that apply only to this project. Open .vscode/settings.json to view the local settings.
{
  "editor.defaultFormatter": "esbenp.prettier-vscode",
  "editor.formatOnSave": true
}
Testing our development environment
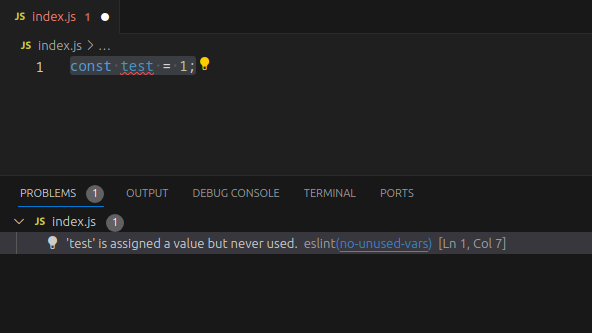
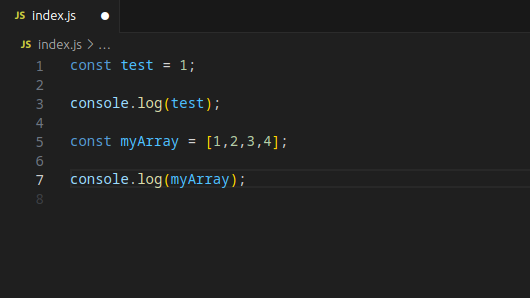
We are ready to test our development environment. Create an index.js file with the following contents:
const test = 1;
If ESLint was setup properly it should output an error in the Problems tab, complaining that we created a variable which we don’t use in the code.
Modify index.js by adding the contents below, but do not save yet.
const test = 1;

console.log(test);

const myArray = [1,2,3,4];

console.log(myArray);
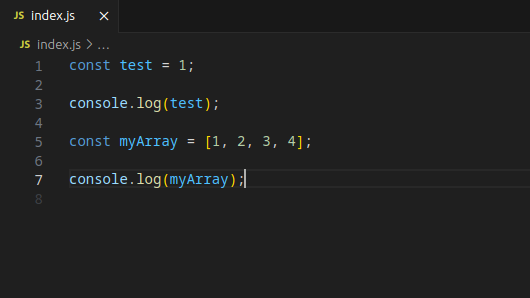
Notice that there are no spaces between the numbers in myArray.
Once you save, Prettier should auto-format your file, adding the missing spaces between the numbers. Magic!
Commit to Git
A programmer should always use version control, so make sure Git is installed on your platform.
For Ubuntu just run:
sudo apt install git
And then create an empty Git repository.
git init
We want to ignore some directories, so create a .gitignore file with the following contents.
node_modules/
.vscode/
And finally, in your terminal run:
git add -A
git commit -m "Initial"
That’s all. Happy coding!